Showing: 1 - 13 of 13 RESULTS

Sticky Pomegranate Chicken Wraps

You will love these moreish wraps filled with roasted chicken in a sticky pomegranate molasses marinade, crispy lettuce, fresh herbs, pickles and moosir mayo.

This is an easy recipe and will be familiar territory for you if you have, as most people have these days, cooked and / or eaten some kind of wrap. If not, it is still an easy recipe to follow and worth getting your hands on the two ingredients you may not have to hand – pomegranate molasses and moosir (Persian shallots).

What is Pomegranate Molasses?

Pomegranate molasses is a thick syrup with a dark grape colour made from reducing pomegranate juice. The juice is obtained from a tart variety of pomegranate. You can pick up pomegranate molasses (rob-e-anar) from most Middle-Eastern food shops, online or even at some local supermarkets.

It is deliciously tart but the addition of maple syrup and freshly squeezed orange juice balances the favours perfectly for this marinade and complements the chicken. As with all marinades, the longer you leave it the better. So if you have time to marinate your chicken  overnight (thighs with skin on and bone in preferably) this will allow the chicken to absorb all the delicious flavours. 

What is Moosir?

Moosir is a Persian shallot and has a flavour profile similar to garlic but slightly sweeter and less spicy. They grow wild in the foothills of the Zagros Mountains. They have to be found and dug out of the earth – a similar process to truffles. Commonly used in a yoghurt dip called Maast-o-Moosir, this ingredient adds an amazingly distinctive flavour to dishes. You can buy moosir from most Middle-Eastern food shops or online.

Moosir is bought in its dried form and will need to be rehydrated before use. Soak the moosir in water for 3 to 24 hours. Drain, then rinse in cold water and pat dry. Check the moosir and cut out any stems that remain hard after soaking. I have added the moosir to the mayonnaise for the chicken wraps. Once hydrated, chop the moosir finely and mix with mayonnaise. If you cannot get your hands on this Persian shallot, then you can use garlic. I would recommend steeping the cloves in boiled water before mincing and adding to the mayonnaise to temper the raw garlic.

How to Make Sticky Pomegranate Chicken Wraps

  • Marinade the chicken thighs. Put the chicken, onion, garlic, turmeric, cinnamon, pomegranate molasses, tomato purée, sriracha, maple syrup, orange juice, seasoning and olive oil in a mixing bowl and mix to coat evenly. Cover, place in the fridge and let it marinate for a minimum of 4 hours (preferably overnight).
  • Make the Moosir Mayo. Place the mayonnaise in a bowl and add your minced moosir and refrigerate until you are ready to serve.
  • Cook the chicken thighs. Heat the oven to 200°C/180°C fan/gas 6. Transfer the chicken and its marinade to a shallow roasting tin. Roast for 40-45 minutes, until the chicken and onions have caramelised and are sticky. Remove the chicken from the oven and leave to rest for 10 minutes.
  • Prepare the wraps and condiments. Take your tortillas, wrap them in foil and place them in the oven to heat for about 15 mins. Then remove them from the oven and turn off the heat. Scatter the chicken with the fresh mint and pomegranate seeds.
  • Build the wrap. Take a wrap and spread a layer of moosir mayo on it. Then add shredded lettuce, sliced chicken (removed from the bone) and caramelised onions, topping with Torshi Soorati (pickled red cabbage and onion) or other pickle, the chopped fresh herbs and pomegranate seeds. Roll up the wrap and tuck in.
Serve these wraps with wedges – sweet potatoes are a great accompaniment.

Sticky Pomegranate Chicken Wraps

Prep Time10 minutes
Cook Time45 minutes
Total Time55 minutes
Course: Main Course
Cuisine: Persian, Iranian, Fusion
Keyword: easy recipe, chicken wrap
Servings: 4 (to 6)
Author: Mersedeh Prewer

Ingredients

For the chicken

  • 8 free-range chicken thighs (skin-on, bone-in)
  • 1 large red onion (finely sliced)
  • 4 cloves garlic (crushed)
  • 1/2 tsp turmeric
  • 1 tsp cinnamon
  • 3 tbsp pomegranate molasses
  • 1 tbsp tomato purée
  • 1 tbsp sriracha chilli sauce
  • 2 tbsp maple syrup
  • Juice of half an orange
  • 2 tbsp olive oil
  • Salt and pepper (to taste)

For the Moosir Mayo

  • 1/2 cup mayonnaise (8 tbsp)
  • 6 discs of dried moosir (rehydrate the moosir the night before by soaking in water. Rinse then pat dry before mincing and adding to mayo).

To Serve

  • 8 large tortilla wraps
  • Crunchy lettuce (Romaine or iceberg - shredded)
  • Torshi Soorati or other pickle of your choice
  • Fresh coriander, mint and parsley (chopped) and pomegranate seeds (for garnish and sprinkling in the wraps)

Instructions

  • Score each chicken thigh twice with a knife through the skin and into the meat. Then place in a bowl. Add onion, garlic, turmeric, cinnamon, pomegranate molasses, tomato purée, sriracha, maple syrup, orange juice, seasoning and olive oil and mix to coat evenly. Cover, place in fridge and let it marinate for a minimum of 4 hours (preferably overnight). About 1 hour before cooking, remove from the fridge and set aside to come up to room temperature.
  • Place mayonnaise in a bowl and add minced moosir. Stir and refrigerate until you are ready to serve.
  • Heat the oven to 200°C/180°C fan/gas 6.
  • Transfer chicken and marinade to a shallow roasting tin, then roast for 40-45 minutes, until chicken and onions are caramelised and sticky. Remove from oven and leave to rest for 10 minutes. Garnish chicken with the fresh mint and pomegranate seeds.
  • About 5 minutes before removing your chicken from the oven, take tortillas, wrap them in foil and place them in oven to heat for about 15 mins. Then remove them from oven and turn off heat.
  • Build a wrap by spreading a layer of moosir mayo on it, adding shredded lettuce, layering with sliced chicken (removed from the bone) and caramelised onions. Top with Torshi Soorati or other pickle, the chopped fresh herbs and pomegranate seeds. Roll up the wrap and tuck in. 

Omelette Gojeh Farangi (Persian Tomato Omelette)

Although called an omelette, this beloved Persian breakfast dish is closer to scrambled eggs due to the silky texture from the amount of tomatoes used. Sometimes referred to as Omelette Irani (The Iranian Omelette), it is the most commonly eaten egg-based breakfast in Iran whether in people’s homes or in cafes. 

The Persian Equivalent of Shakshuka

Omelette Gojeh Farangi is made by cooking eggs in a rich tomato sauce. The sauce is flavoured with aromatics and spices – garlic, cumin, turmeric and chilli. The tomato to egg ratio is quite high so the resulting texture is creamy.

It is usually eaten at breakfast or as a brunch option but can also be eaten as a lunch or dinner option. 

How to Serve Omelette Gojeh Farangi

Serve this dish with flatbread; feta; a sprinkle of fresh herbs, such as coriander or parsley; and Persian pickled cucumbers for an authentic Persian breakfast experience. You can also eat it with rice or chips when serving it at lunch or dinner.

Other Breakfast Recipes…


Omelette Irani

Persian tomato omelette
Prep Time15 minutes
Cook Time25 minutes
Total Time40 minutes
Course: Breakfast, Main Course, Brunch
Cuisine: Persian, Iranian
Keyword: omelette gojeh farangi, tomatoes, vegetarian, egg recipes
Servings: 4
Author: Mersedeh Prewer

Ingredients

  • 2 tbsp olive oil
  • 1 medium onion (finely diced)
  • 4 cloves garlic (crushed / minced)
  • 1 tsp turmeric
  • 1 tsp dried red chilli flakes
  • 1 tsp cumin seeds
  • 10 g fresh coriander (leaves and stalks chopped finely)
  • 1 tbsp tomato purée
  • 500 g cherry tomatoes (halved)
  • 125 ml water
  • 2 tsp balsamic vinegar
  • Salt and pepper (to taste)
  • 8 free range eggs
  • Chopped fresh coriander leaves to sprinkle as a garnish

Instructions

  • Take a large frying pan, add the olive oil and place over medium-high heat.
  • Add onions and cook until they turn golden.
  • Add garlic, all the spices and herbs and stir until their aromas are released.
  • Then add tomato purée, stir into the mixture and cook for a few more minutes.
  • Add the halved cherry tomatoes, followed by 125 ml of water and stir. Once the mixture starts to bubble, reduce heat to low-medium to allow to simmer, stirring occasionally. Once the cherry tomatoes have broken down and the mixture is looking like a sauce, add the balsamic vinegar and season with salt and pepper to taste.
  • Take 4 of the eggs and crack them into a bowl and beat them. Then pour into the tomato mixture in the pan and stir in gently to distribute evenly. You want the beaten eggs to be mixed into the tomatoes but not completely scrambled or cooked through.
  • Make 4 holes evenly distributed in the tomato mixture. Crack the remaining eggs into the holes.
  • Cover the pan and cook over medium-low heat for about 5 to 7 minutes, depending on how runny or cooked you prefer the eggs. Once the eggs are cooked to your liking, turn the heat off.
  • Season the eggs with a pinch of salt and pepper and sprinkle some chopped fresh coriander leaves on the dish prior to  serving with flatbreads, Persian pickled cucumbers and / or fresh herbs.

Panir Bereshteh (Persian Scrambled Eggs with Feta & Dill)

Delicious, silky scrambled eggs cooked with spring onions, turmeric, feta and dill. A light and healthy cooked breakfast option which pairs brilliantly with smoked salmon. 

What is Panir Bereshteh?

Panir Bereshteh is a delicately flavoured old recipe from Gilan Province, in northern Iran, which lies along the Caspian Sea bordering Russia. Feta is cooked with spring onions, garlic and turmeric before eggs are folded in. The name of the dish translated means ‘crispy cheese’ (Panir – cheese, and Bereshteh – crispy), but the actual dish is not crispy as the cheese melts to a creamy sauce while cooking, before the eggs are added.

Gilan is lush and green with many delicious dishes originating from the province, particularly vegetarian ones, namely Mirza Ghasemi (smoked aubergines and eggs) and Baghali Ghatogh (eggs with broad beans and dill).

Serving Panir Bereshteh

This recipe is a great addition to your breakfast or brunch catalogue of recipes with the dill and feta resulting in fresh and light flavours. Serve with flatbread and a side of smoked salmon. For a veggie option, serve with tomatoes and cucumbers as pictured.

Other Breakfast Inspiration


Panir Bereshteh

Scrambled Eggs with feta & dill
Prep Time5 minutes
Cook Time5 minutes
Total Time10 minutes
Course: Breakfast, Brunch
Cuisine: Persian, Iranian
Keyword: egg recipes, easy recipe
Servings: 2
Author: Mersedeh Prewer

Ingredients

  • 1 tbsp olive oil
  • 1 tsp butter or ghee
  • 1 garlic clove (crushed) (optional)
  • 80 g feta cheese
  • 2 spring onions (finely sliced)
  • 1/2 tsp turmeric
  • 4 large free-range eggs (beaten)
  • 1 tbsp fresh dill (chopped and a further pinch to garnish)
  • Salt and pepper (to taste)

Instructions

  • Add olive oil and butter to a frying pan and heat on a medium heat until the butter has melted. Add crushed garlic and stir until aroma released.
  • Add feta cheese and let it cook down until it has melted into a creamy mixture.
  • Reduce heat to low, add spring onion and stir gently.
  • Add turmeric and stir gently pushing the creamy mixture evenly across the pan, ready for the egg mixture.
  • Add dill to beaten eggs, then pour into the frying pan, tilting the pan slightly from side to side so the mixture spreads equally. Increase the heat to medium.
  • As the eggs start to firm, take a spatula and stir gently to the preferred consistency. Turn heat off and serve on its own or with smoked salmon, flat bread or toast.


Khoresh Karafs – Sabz (Lamb, Herby and Celery Stew)

This traditional Persian stew is made with lamb, slow-cooked with celery, mint and parsley resulting in a deliciously light yet comforting stew. 

Winter is the season of stews and Khoresh Karafs is a lovely introduction if you are new to Persian cuisine. Persian stews are relatively low maintenance to cook. They just need time to cook and for the flavours to fall into place.

What is Khoresh Karafs?

Khoresh Karafs is a Persian stew made with lamb, celery and fresh herbs (mint and parsley). ‘Karafs’ translated from Persian is ‘celery.’ And ‘Khoresh’ means ‘stew.’

We have two versions of Khoresh Karafs. The first one, the subject of this recipe and the better known version, is cooked with herbs. The second one is cooked with tomatoes and usually chicken. We refer to them by their colour: Khoresh Karafs-e-Sabz (‘sabz’ means green in Farsi); and Khoresh Karafs-e-Ghermez (‘ghermez’ means red in Farsi).

Ingredients In Khoresh Karafs

The ingredients for this khoresh (stew) are simple and easy to source with most items available at your local supermarket.

You will need:
  • Lamb – the best cut of lamb to use for this recipe is from the leg and from a butcher. Ask for the leg to be trimmed of the outer layers of fat and to be cut into stew size pieces with the bone.
  • Celery – use fresh celery to ensure you get the delicious peppery and savoury flavour profile  from this amazing vegetable.
  • Parsley & Mint – use fresh herbs. As a guide 2 large bunches or 250 grams of parlsey to 1 large bunch or 150 grams of mint.
  • Onion, Garlic, Turmeric, Saffron and Fresh Lime Juice – the aromatics and flavour enhancing elements of the stew.
  • Vegetable Oil – or any other neutral flavoured oil for cooking elements of the stew prior to adding the cooking liquid.
  • Water or Vegetable Stock – the cooking liquid for the stew.
  • Salt and Pepper – to season the stew.

Variations Khoresh Karafs

  • Some add dried limes (Limoo Amani) to their khoresh while cooking but I prefer it without.
  • You can use beef but make sure it is the cut of beef best for stewing i.e. braising beef such as skirt, chuck or blade.
  • You can also use chicken instead of red meat.

How to Serve Khoresh Karafs

As with all Persian stews, the flavour continues to mature and intensify if you leave it for a day before you reheat and serve. This is, therefore, a dish you can make on a Sunday evening and tuck into later in the week reducing the time spent in the kitchen and washing up afterwards. Serve it with Persian rice – Chelow and a lime dressed chopped salad like Salad Shirazi.

Leftovers

Store in an airtight container in the fridge up to 3 days. Khoresh Karafs can also be frozen up to 4 months. Defrost thoroughly before reheating. Gently reheat khoresh in a saucepan or in a microwave.


Khoresh Karafs

Lamb, herb and celery stew
Prep Time30 minutes
Cook Time1 hour 30 minutes
Total Time2 hours
Course: Main Course
Cuisine: Persian, Iranian
Keyword: celery, mint, parsley, lamb
Servings: 4 to 6
Author: Mersedeh Prewer

Ingredients

  • 4 tbsp vegetable oil
  • 250 g fresh parsley
  • 150 g fresh mint
  • 1 large head of celery (about 7 to 10 stalks cut into 2 to 3 inch chunks)
  • 1 medium onion
  • 2 cloves garlic (crushed)
  • 1 tsp turmeric
  • 0.6 to 1 kg lamb on the bone (preferably leg, portioned into chunks approx. 2 to 3 inches width)
  • 600 ml water or vegetable stock
  • 1/8 tsp ground saffron (bloomed in 2 tbsp of water)
  • Juice of 1 to 2 fresh limes
  • Salt and pepper (to taste)

Instructions

Gather and Prepare the Ingredients

  • Remove woody stems from herbs and discard. Wash herbs and place on a tea towel and dab them dry.
  • Finely chop herbs either by hand or using a food processor and set to one side until ready to use.
  • Finely dice your onion. Take the celery and chop into 2 inch chunks.

Prepare the Stew

  • Take a casserole dish / saucepan which has a lid and a minimum capacity of 3.5 litres and place over medium-high heat. Add 2 tbsp of oil and brown lamb and remove from pan.
  • Add diced onions to pan and cook until they turn golden. Add crushed garlic cloves and stir, being careful that the garlic does not turn brown or burn.
  • Add lamb, then turmeric and stir until distributed evenly.
  • Add water or vegetable stock and bloomed saffron (the liquid should just cover the meat so adjust if necessary). Place lid on pan and turn down heat to low and let simmer.

Saute the Celery and Herbs

  • Take a frying pan and add 1 tbsp of oil and place over medium-low heat. Add chopped herbs and stir until the herb mix has softened, being careful not to burn it. A few minutes will suffice. Then add the herb mix to the lamb and stir. Replace the lid.
  • Sauté celery over medium heat in frying pan used for the herbs with the remaining 1 tbsp of oil for no more than a few minutes. Just enough for the celery to take on some heat from the pan but not soften. Turn the heat off under your frying pan and add celery to the lamb and herb mixture.

Cook and Season the Stew

  • After 5 minutes of simmering, add the fresh lime juice (start with half the lime and then add more), salt and pepper and adjust according to taste.
  • Continue simmering the stew for a minimum of an hour, stirring gently every 15 minutes and checking the softness of the meat - ideally you want the meat to be falling off the bone.

Serve the Khoresh Karafs

  • When ready, turn off the heat and serve with chelow and either torshi or a salad with a citrus dressing.


Chelow and Tahdig (Persian Rice – The expert way)

Create rice with perfectly tender, separate and fluffy grains with a crunchy layer of crispy rice called Tahdig. This is the beloved way Iranians make rice. Once you master the skill, you are unlikely to make rice any other way!

What is Chelow?

Chelow is the name given to the white fluffy grains of rice either served with our kebabs or khoresh (stews) in Iranian cuisine. We also have Kateh, which refers to our version of easy-cook sticky rice, and polo, which refers to our rice cooked with vegetables,  herbs and/or meat (similar to the Asian biryani).

Polo follows the same cooking procedure as chelow but has the added stage of preparing and cooking the ingredients to be mixed in to the rice. Kateh is simple as you boil and steam the rice without draining the water by letting it evaporate in the saucepan. Kateh tends to be reserved for family weekday meals.

What is Tahdig?

The common feature in the various Persian rice options is that they all yield the crispy rice, which forms at the bottom of the cooking pot, called ‘Tahdig’. Tahdig literally translated means ‘bottom of the pot’ and is the most cherished part of our meals. I don’t think I have ever met someone who dislikes tahdig!

Although kateh is the easiest way of cooking Persian-style rice it does not yield a tahdig as superior as chelow or polo. Therefore you are rewarded for going the extra mile with the slightly more complicated way of cooking rice.

To achieve the perfect fluffy rice and golden tahdig is a commitment. Despite this, even the veteran chelow and tahdig cooker sometimes has an off day with rice coming out a bit mushy and the tahdig burnt. So don’t be hard on yourself if you commit to this journey and it takes a while to master it.&nbsp

Tahdig Varieties

Now while chelow has a standard set of preparation and cooking steps, tahdig has a number of different options available. The most common are rice, potato or flatbread options. 


As with the evolution of many cuisines, experiments have been undertaken to explore new ways of reinventing a classic. In the case of tahdig people have experimented with ingredients to see if they can create a new type of tahdig as good as the originals. I’ve seen tahdigs made with lettuce, fish and chicken. 

Ingredients and Equipment to Make Chelow & Tahdig

Ingredients
  • White long grain basmati rice – if you want to cook authentic Persian style rice this is the perfect rice to use. You can buy this from your local supermarket or local Middle-Eastern or Asian food shops. I recommend Tilda.
  • Saffron – is needed for the Tahdig layer and potentially for serving it (see ‘How to serve Chelo & Tahdig’ below). Always grind your saffron strands into a fine powder after purchasing. For utilisation in Persian cooking, always bloom in water as directed in recipe.
  • Salt – try not to baulk at the amount of salt used. Rice needs a lot of salt as it can be quite bland and the boiling stage washes a lot away. Taste a grain or two of your rice at step 6 of the recipe below. If it tastes too salty just pour a little cold water over your parboiled rice to wash some away. 
  • Neutral flavoured oil – used to create the Tahdig layer. 
  • Butter / ghee / or vegan equivalent – used for the Tahdig layer but also to drizzle over the rice pre steaming to create fluffy separate grains.
Equipment
  • A good quality non-stick saucepan with a glass lid – essential kit to make the perfect chelow and tahdig, particularly if you want to flip the rice out as a contained cake-style rice encased in tahdig.
  • A small-hole colander or sieve – to drain the rice.
  • A clean tea towel – an absolute must as it aids the steaming of the rice by absorbing the water droplets, which would otherwise form on the lid of your saucepan and fall back on to the rice making it mushy.

Steps to Make Chelow

Chelow has a 6-step-process to follow, summarised below:

  1. Wash the rice. Removes the starch from the rice in order to assist in producing a tender fluffy grain. It also assists in the rice being more nutritious.
  2. Soak the rice. Not all consider this stage is necessary any more in light of the quality of long grain basmati rice available, however it is of note that some famous brands recommend soaking their rice for 30 minutes pre cooking. Soaking the rice promotes more thorough cooking by allowing moisture to reach the centre of the rice grain, it further improves its final texture, makes the grain less brittle and assists the rice to become more digestible.
  3. Par boil the rice until al dente. The first stage of the cooking process, which partially cooks the rice.
  4. Drain the rice. The rice does not continue to cook in the cooking liquid but is steamed with the water already absorbed into the rice from step 3 and an additional small amount of water.
  5. Prepare the Tahdig layer and then layer remaining rice on top. The tahdig layer is placed at the bottom of the pot on a little saffron water and oil and / or butter before the rest of the rice is layered on top. A little water and melted butter is poured over the rice to assist with the final cooking stage.
  6. Steam the rice. The rice is steamed with a lid covered in a tea-towel to create our beloved chelow and tahdig.

How to Serve Chelow & Tahdig

The recipe below sets out steps to serve the chelow and tahdig as a cake-style, tahdig encased rice as seen in the first set of pictures above.

For larger quantities, once the rice has cooked, I recommend spooning the rice out and serving it on one plate and then serving your tahdig separately on another dish. The latter is usually garnished with saffron coloured rice sprinkled on top (see picture). In my family we use a little rose water when blooming the saffron for the rice garnish as it adds a delicate floral note to the chelow, so if you want to present your rice this way then it is worth getting your hands on some rose water from your local Middle-Eastern food shop.

Simply mix a little cooked rice with saffron bloomed in a little water and rose water until it takes on a golden hue. Then sprinkle the saffron rice on top of the plain white rice and then serve.

 
As a final note, the primary recipe below is to make chelow with rice tahdig. Refer to the ‘Alternative Step’ sections below for guidance on how to make potato or flatbread tahdig.


Check out my Reel on How to Cook Chelow and Tahdig


https://www.instagram.com/reel/CgzfrOfokqM/?utm_source=ig_web_copy_link


Chelow and Tahdig

Persian Rice - the expert way
Prep Time10 minutes
Cook Time1 hour
Total Time1 hour 10 minutes
Course: Rice Dish, Accompaniment
Cuisine: Persian, Iranian
Keyword: basmati rice, tahdig
Servings: 4 to 6
Author: Mersedeh Prewer

Ingredients

  • 2 cups white long grain Basmati rice (standard UK measuring cup capacity 250 ml - approx 400 grams of rice)
  • 2 tbsp salt
  • Water (as directed below)
  • 1/8 tsp ground saffron bloomed in 2 tbsp of water for the tahdig
  • 2 tbsp vegetable oil plus extra if you are making potato or flatbread tahdig as per 'Alternative Step' sections below
  • 2 to 3 tbsp ghee / butter / vegan equivalent

Instructions

Wash and Soak the Rice

  • Wash rice in cold water until water runs clear. Be gentle, otherwise you will damage and break the grains.
  • Place rice with 1 tbsp of salt in a bowl and pour in cold water to cover up to 2 inches above the top. Leave to soak for a minimum of 30 mins (I leave mine overnight and cook the rice during the afternoon of the day after).

Parboil the Rice

  • Fill a large non-stick saucepan (minimum capacity 2.5 litres) with approximately 1.5 litres of water and 1 tbsp of salt. Place over high heat and bring water to a boil.
  • Drain the rice and then add to the saucepan. Gently stir to make sure it does not stick to the pan.
  • Stay with the saucepan and do not leave it at this stage. It is crucial that you remove the rice and drain it at the right time. Every minute give it a gentle stir and take a grain and check the texture - either between your fingers or using your teeth. What you want is the grain to be soft on the outer layer but still firm in the centre. It can take any time from 3 to 7 minutes with the quantity in this recipe.
  • Once the parboiled rice reaches the correct texture, turn your heat off and drain in a colander or sieve. Sprinkle a little cold water to halt the cooking process. Taste the rice - if it is very salty then rinse it further with a little water.

Prepare the Tahdig Layer

  • Place the empty saucepan on your stove.
  • Add 2 tbsp of oil and 1 tbsp of butter / ghee / vegan equivalent to the pan and place on a low heat to melt. Then turn the heat off. (See * below for alternative tahdig layers - potato or flatbread).
  • Add your bloomed saffron to the saucepan and mix with the oil to distribute evenly (this will give a lovely golden colour to your tahdig).
  • To make your tahdig spoon about a 1-inch layer of rice into the saucepan and gently stir to mix with the saffron oil to ensure colour is distributed evenly. Be careful not to break the grains. Then pat down flat with the back of a spoon.
  • Then layer the remaining rice and gently pat down to the shape of the saucepan. Take the end of a tablespoon and gently poke about 5 small holes in the rice to allow steam to escape while cooking. Then pour over 2 tbsp of cold water.
  • Drizzle 1 to 2 tbsp of melted ghee / butter / vegan equivalent over the rice.

Steam the Rice

  • Place your glass lid on the saucepan and turn the heat to the highest setting. Once you start to see steam rise from the rice (your glass lid will start to get clear from the steam and droplets of water will start to form on the lid - it is perfectly fine to have a little look under the lid now and again to check the steam situation) lower the heat to the minimum flame or equivalent on your cooker. Cover the lid with a tea towel (making sure it is not a fire risk) and replace the lid on the saucepan.
  • Allow to steam for a minimum of 45 mins to get a crunchy and thick layer of tahdig.

Serve the Chelow & Tahdig

  • When the cooking time is over turn off the heat and remove the lid from the saucepan. Take a serving dish that covers the opening of the saucepan and place it on top. Flip the rice out onto the dish and serve with either a khoresh, kabab, curry or any other dish.

*Alternative Tahdig - Potato Tahdig

  • If you are making potato tahdig, you will need 1 medium-sized potato peeled and sliced into 1.5 cm thick discs. Place the sliced potatoes into a bowl of water to wash off excess starch - this will help during the crisping process while the rice steams. It will also stop the potatoes turning brown as you get the rice ready to steam.
  • For preparing a potato Tahdig layer - add an extra tablespoon of vegetable oil to the bottom of your pot then layer your potatoes at the bottom of the pan on top of the saffron oil (try not to overlap them so they all cook through evenly and crisp up) and then layer your rice on top and pat down to fill any gaps between the potatoes. Then follow subsequent steps of the recipe.

*Alternative Tahdig - Flatbread Tahdig

  • If you are making flatbread tahdig, you will need 1 medium Middle-Eastern style flatbread like lavash or 1 medium white tortilla. 
  • For preparing a flatbread Tahdig - use the flatbread to cover the bottom of the pan  or you can cut shapes into it and layer the bottom surface of the saucepan only. Either way, before layering your flatbread, take a pastry brush and coat your flatbread generously with vegetable oil and then lay it on the saffron oil. Then layer your rice on top and follow the subsequent steps of the recipe. If you are using the whole flatbread to cover the bottom of the saucepan, without cutting shapes, be a little cautious with the timing on lowering the heat to steam the rice as the flatbread can burn quite quickly. As soon as you see steam creeping round the edges of the bread, then turn down the heat and place the lid wrapped with a tea towel on the saucepan. Follow the subsequent steps of the recipe.

Eshkeneh (Persian Onion & Egg Drop Soup)

This traditional soup from Iran is simple to make and packed full of flavour from the aromatics, turmeric and fenugreek. Comforting with gooey eggs to dip into with the bread of your choice, this soup is a winter warmer.

What is Eshkeneh?

Eshkeneh is a soup made with the primary ingredients of onion, potato, fenugreek, turmeric and egg. There are many variations of the recipe for Eshkeneh. If you have tried it before, you may be more familiar with the version that results in a golden soup with flecks of green from the fenugreek leaves. One of the many variations is made with the addition of tomatoes and this is the recipe I have shared below.

Eshkeneh originates from the Khorasan region of Iran – the east side. My mother and her family are from Mashhad, which is sometimes referred to as the ‘capital of Khorasan’, so this soup was a regular feature in my childhood.

Ingredients in Eshkeneh

Onions and potato are cooked with fresh and dried aromatics in a broth made with tomatoes and tomato purée. Eggs are added to make an egg-drop soup and a lemon and chive oil is drizzled over before serving.

  • Onions. The soup should feel like onion is one of the major ingredients so use a very large onion or two medium onions. See it as the Persian equivalent of a French onion soup.
  • Garlic. Used as an aromatic to enhance the flavour.
  • Potato. Use either an all-rounder potato like a Maris Piper or a waxier potato like a red potato. You want the potato cubes to keep their shape.
  • Fenugreek. You need the dried leaf variety not the seeds.
  • Tomatoes and Tomato Purée. Flavours, thickens and gives a rich red colour to the soup.
  • Water or Vegetable Stock. The cooking liquid for the soup.
  • Turmeric. Used to flavour the soup.
  • Lemon Juice. Used both to flavour the soup and the chive oil drizzled over before serving.
  • Salt and Pepper. To season the soup.
  • Eggs. Cooked in the soup to your preference (I like mine to have a soft yolk to dip my bread into). Use good quality eggs such as organic free-range.
  • Olive Oil. Used for cooking the soup and for the chive oil drizzle.
  • Chives. Used for the chive oil.
Serve with flatbread such as Nan-e Barbari (traditional Persian flatbread) or Sesame and Nigella Seed Flatbread
Try another loved Persian Soup: Soupe Jo – Persian Cream of Barley and Chicken Soup

Eshkeneh

Persian onion and egg-drop soup
Prep Time10 minutes
Cook Time40 minutes
Total Time50 minutes
Course: Soup
Cuisine: Persian, Iranian
Keyword: tomatoes, vegetarian, eggs, fenugreek
Servings: 2
Author: Mersedeh Prewer

Ingredients

For the Soup

  • 2 tbsp olive oil
  • 1 large onion (finely diced)
  • 1 clove garlic (crushed)
  • 1 tsp turmeric
  • 1 tbsp tomato purée
  • 1 tbsp dried fenugreek leaves (crush a little if the leaves are large)
  • 1 large potato (finely diced - 1 cm cubes)
  • 1 medium tomato (chopped)
  • 600 mls water or vegetable stock
  • Salt and pepper (to taste)
  • A squeeze or two of fresh lemon juice
  • 2 large free range eggs

For the Chive Oil Garnish

  • 1 tbsp olive oil
  • A handful of fresh chives
  • A squeeze of lemon juice

Instructions

  • Take a medium size saucepan and place on medium-high heat. Add olive oil and then onion. Cook onion until translucent and starting to turn golden. 
  • Add garlic and turmeric and stir into the mixture. Add tomato purée. Then add dried fenugreek leaves and stir into mixture.
  • Add diced potato and stir gently for a few minutes, making sure the potatoes do not stick to the pan.
  • Add chopped tomatoes and then water or stock. Once soup starts to bubble, lower heat to low and let simmer for 20 minutes minimum. Check in now and again to stir occasionally.
  • Season according to taste.
  • Place olive oil, finely chopped fresh chives and lemon juice in a bowl and mix and put to one side to garnish the soup when ready to serve.
  • Prior to serving, and when the soup is simmering, crack eggs into soup as far away as possible from each other so they don't merge. Poach 2 mins for soft; 4 mins for medium; and above 5 mins for hard. Turn off heat and serve in bowls with lemon and chive oil drizzled on top and flatbread to dip.

Kabab Tabei (Pan-Cooked Kofte Kebabs with Roasted Tomatoes)

These Persian kofte kebabs can be cooked anytime of the year with no need for a BBQ or skewers. They are easy to make and retain all the juiciness you expect from a kebab.

What is Kabab Tabei?

If you have eaten at a Persian restaurant, then you will be familiar with Kabab Koobideh. The long metal skewers of minced lamb cooked to juicy perfection over a charcoal flame. Kabab Tabei is the easy version, cooked in a pan with no skewers required, and accompanied with a side of roasted tomatoes.

Ingredients in Kabab Tabei

With the exception of saffron, the ingredients should be easy to source from your local supermarket. 

  • Minced Lamb or Beef – use mince with a 20% fat content to make the kebabs. This will ensure they are juicy.
  • Onion and Garlic – fresh aromatics for the dish adding to the flavour of the kebabs.
  • Turmeric and Saffron – spices used to flavour the kebabs.
  • Tomato Purée  – my secret ingredient which creates a juicy kebab.
  • Extra Virgin Olive Oil – used to cook the kebabs and to drizzle over the tomatoes before roasting.
  • Tomatoes – for the accompanying roasted tomatoes. Use small tomatoes on the vine like these.
  • Sumac, Salt and Pepper – used to season the kebabs.

Saffron can be found in most supermarkets nowadays. Remember to always grind the saffron strands to a fine powder after purchase because it makes the saffron go further. Bloom the amount of ground saffron directed in this recipe in water before adding to the Kabab Tabei mixture.

What to Serve with Kabab Tabei

Serve with Kateh or Chelo (Persian rice) and Salad Shirazi as pictured. They can also be eaten with flatbreads, salad, chilli and garlic sauce with a side of chips as part of a fake-away style meal!


Kabab Tabei Instagram Reel

https://www.instagram.com/reel/Chh2YZgIPR0/?utm_source=ig_web_copy_link


Kabab Tabei

Pan-cooked kofte kebabs with roasted tomatoes
Prep Time20 minutes
Cook Time20 minutes
Total Time40 minutes
Course: Main Course
Cuisine: Persian, Iranian
Keyword: lamb, kebabs, easy recipe
Servings: 4
Author: Mersedeh Prewer

Ingredients

  • 500 g lamb or beef mince (approx. 20% fat)
  • 1 large onion
  • 3 cloves garlic (crushed)
  • 1/2 tsp turmeric
  • 1/8 tsp ground saffron (bloomed in 2 tbsp of water)
  • 1 tsp tomato purée
  • 2 tbsps olive oil
  • 2 tsp sumac
  • 500 g small or cherry tomatoes (on the vine)
  • Drizzle of olive oil (for the cherry tomatoes)
  • Salt and pepper (to taste)

Instructions

  • Place mince in a mixing bowl. Grate onion and squeeze most of the juice out. This will ensure the kebab does not fall apart when cooking but will tenderise the meat and be juicy once cooked.
  • Add grated onion, garlic, turmeric, saffron water, tomato purée, salt and pepper to the bowl with mince. Knead mixture well for a few minutes. Cover bowl and leave in fridge for no less than 4 hrs but preferably overnight. Take meat mixture out of fridge about 30 minutes before you want to cook it.
  • Heat oven to 180°C (fan oven). Place tomatoes on a baking dish and drizzle olive oil over them. Season with salt and pepper. Place in oven and roast for 20 minutes.
  • Shape meat mixture into patties of your choice. I shape them into an oval shape about the length and width of my hand (they will shrink a little while cooking).
  • Coat frying pan with oil and place over medium-high heat. After 2 minutes, place kebabs in pan. Sprinkle some sumac on the uncooked side and wait until the meat releases water and the water dries out in the pan before flipping. Sprinkle sumac on the cooked side. Wait until kebabs release further water and it is cooked off. Turn off heat.
  • Serve kebabs with the roasted tomatoes and rice or bread.

Notes

If you like your kababs spicy then try my Kabab Tabei-Tond (‘Tond’ means spicy in Farsi). Follow the recipe and method as set out above but at step 3 replace the tomato purée with 1 tsp of Harissa paste or 1 tsp of biber salcasi (Turkish spicy tomato paste), which you can buy from any local supermarket, and 1 tablespoon of chopped fresh coriander.

Salad Shirazi (Cucumber, Tomato & Onion Salad)

Often referred to as the National Salad of Iran, this juicy lime-dressed salad is a happy accompaniment to all Persian mains from kebabs to koresh (stews).

The National Salad of Iran

As the name gives away, Salad Shirazi originates from Shiraz, which is located in the South West of Iran. The reason it is called the National Salad of Iran is because it is our only salad recipe! It is similar to the Indian Kachumber and Israeli chopped salads. 

Ingredients in Salad Shirazi

Use fresh and high quality ingredients to get maximum flavour from your Salad Shirazi.

  • Cucumber, tomatoes and red onion: are diced into small chunks, as pictured above. You can chop it into bigger chunks, if you prefer.
  • Dried mint, salt, pepper, fresh limes and good quality salad oil, such as extra virgin olive oil or toasted argan oil: create the dressing. I sometimes add sumac to the dressing, which gives another layer of citrus to the final salad.

Tips for Making Salad Shirazi

Scrape some of the the seeds out of both the cucumber and the tomatoes before dicing the salad ingredients. Although you want a juicy salad, you don’t want a water-logged one. Don’t be too obsessive about seed removal because the salad is meant to be juicy. You want to have some delicious dressing to spoon over the other elements on your plate.

Serving Suggestions

Serve it as a side salad with all Persian mains from khoresh to kebabs. Here are some suggestions.

This salad can be eaten with any cuisine so no need to limit it to a side salad for Persian mains only.

How to Store Salad Shirazi

Keep in an airtight container in the fridge and it will last up to 2 days.


Salad Shirazi

Persian cucumber, tomato and onion salad - the National Salad of Iran
Prep Time15 minutes
Total Time15 minutes
Course: Salad, Appetiser
Cuisine: Persian, Iranian
Keyword: vegetarian, vegan
Servings: 4
Author: Mersedeh Prewer

Ingredients

  • 1 medium cucumber
  • 3 medium tomatoes
  • 1 medium red onion
  • 3 tbsp extra virgin olive oil or toasted argan oil
  • 2 limes (zest of one lime, juice squeezed from both for the dressing)
  • 2 tsp dried mint (fresh mint can also be used as an alternative or in addition to the dried mint)
  • Salt and pepper (to taste)

Instructions

  • Halve tomatoes and scrape some of the seeds out. Do the same with cucumber. Finely dice onion, tomatoes and cucumber into small chunks.
  • Make a dressing out of olive oil, lime juice and zest, salt, pepper and mint. Drizzle over salad.
  • Toss salad and taste - adjust seasoning if required and then serve.

Torshi Soorati (Red Cabbage & Onion Pickle)

An easy pickle made from red cabbage and red onion. Ready to eat in 5 days, this vibrant pink pickle is a perfect accompaniment to a range of dishes.

What is Torshi?

Torshi is derived from the word ‘Torsh’ in Farsi, which means sour. Torshi is used to describe vegetables pickled in vinegar. They are often eaten as accompaniments to dishes and / or aperitifs. On a Persian sofreh (spread) you will always find some Torshi.

The sour taste of the pickles perfectly complements many of our dishes, particularly those containing lamb, as it brings a balance to the richness of the flavours.

How to Make Torshi Soorati

Thinly slice red cabbage and red onion. Place in a pickling jar (I am a fan of kilner jars) with coriander seeds. Dissolve the sugar and salt in white vinegar and pour into the jar. Leave for a minimum of 5 days to pickle. It is as simple as that!

‘Soorati’ means pink in Farsi and the pickle has been given this name as the resulting colour is a vibrant pink. A very versatile pickle suiting many cuisines, including Indian and Asian style dishes.

Eat Torshi Soorati With…

This pickle is delicious with so many dishes. Add to fried egg sandwiches, eat with kebab, burgers and wraps such as my sticky pomegranate chicken wraps. A perfect side to noodles too!

The Pickling Liquid

You may be left with some pickling liquid once the pickles are finished. Use it as a basis for a salad dressing. Just add olive oil and adjust with other flavourings such as a bit of lime juice and / or honey.


Torshi Soorati

Red cabbage and red onion pickle
Prep Time20 minutes
Pickling Time5 days
Total Time5 days 20 minutes
Course: Appetiser, Accompaniment
Cuisine: Persian, Iranian
Keyword: torshi, pickle
Servings: 1 litre jar of pickles
Author: Mersedeh Prewer

Ingredients

  • 1 red onion
  • 1/2 small red cabbage
  • 500 ml white wine vinegar
  • 1 tbsp granulated sugar
  • 1 tsp salt
  • 2 tbsp whole coriander seeds
  • 1 litre pickling jar (sterilised)

Instructions

  • Finely slice red onion and red cabbage and mix in a bowl.
  • Place into jar and add a sprinkle of coriander seeds after each layer of the mixture until you reach the top of the jar. Make sure you pack the vegetables tightly in the jar by pressing each layer down.
  • Dissolve sugar and salt in vinegar and pour in up to the neck of the jar. Push the vegetable mix down to pack and squeeze in more of the veg, if you can. Pour in more vinegar if required.
  • Close the lid tightly and leave the jar in a cool dark place like a pantry for 5 days. Once opened store in fridge.

The Alternative Roast (Roast Chicken, Veg Stew & Dumplings)

Slow Roast chicken flavoured with lemon, garlic and herbs, served with a vegetable stew topped with cheesy, herby dumplings.  So delicious and comforting, you won’t miss the roast potatoes!

Why the Alternative Roast

I love a classic roast. Being born and raised in the UK, the Sunday roast is of course a recognised and loved tradition in my household. However, I don’t always love the amount of work and washing up involved. So this is my alternative to the traditional Sunday Roast resulting in less chaos in the kitchen!

What is the Alternative Roast

There are two elements to this recipe: (1) the slow roast chicken; and (2) the vegetable stew topped with herb and cheese dumplings.

(1) The Slow Roast Chicken

A whole chicken is placed in a roasting pan with lemons and herbs such as thyme, rosemary and sage. The chicken is rubbed with garlic butter and drizzled with olive oil. It is then slow roasted to juicy perfection for 3 hrs in the oven.

(2) The Vegetable Stew Topped with Herb & Cheese Dumplings

Vegetables (potatoes, carrots, parsnips, leeks, mushrooms and broccoli) are cooked in one pot. The cooking liquid is a white wine and herb infused gravy. Fluffy dumplings made with parmesan and parsley are made and popped on the top to cook.

How to Serve The Alternative Roast

For presentation purposes, serve in the dishes you have cooked the chicken, stew and dumplings in with a side of cranberry sauce. 

For serving individual portions, ladle some of the stew and dumplings onto each person’s dish. Carve the chicken and add. Serve with a dollop of cranberry sauce on the side.

This recipe is comfort food at its best!

Storing Leftovers

Once fully cooled, store leftovers in an airtight container in the fridge up to 3 days. Reheat in a medium heated oven or in a microwave.

Other Sunday Comfort Food Recipes

Check out some of my other comforting recipes to serve as Sunday lunch.


The Alternative Roast

Slow Roast Chicken served with a Vegetable Stew and Dumplings
Prep Time30 minutes
Cook Time3 hours 15 minutes
Total Time3 hours 45 minutes
Course: Main Course
Cuisine: British
Keyword: family recipes, roast dinner
Servings: 4 (to 6)
Author: Mersedeh Prewer

Ingredients

Roast Chicken

  • 1 large whole chicken (1.8kg - 2kg)
  • 1 lemon (halved)
  • 2 cloves garlic (crushed - for rubbing on the chicken)
  • Fresh mixed herbs roasting herbs (sage, thyme and rosemary - usually sold as a packet of roasting herbs)
  • 2 tbsp butter (room tempertaure)
  • Drizzle of olive oil
  • Salt and pepper

Vegetable Casserole

  • 2 tbsp olive oil
  • 3 cloves garlic (crushed)
  • 400 g new potatoes (washed and halved)
  • 1/2 tbsp plain flour
  • 2 medium leeks (washed and chopped into 2 inch chunks)
  • 4 parsnips (washed, peeled and chopped into 3 inch chunks)
  • 300 g Chantenay carrots (washed and halved)
  • 250 g mushrooms (cleaned and quartered)
  • 8 stalks purple sprouting broccoli
  • 225 ml white wine
  • 1.5 litre chicken stock
  • 2 bay leaves
  • 1 tbsp fresh thyme leaves
  • Salt and pepper  (I sometime use crushed / ground pink peppercorns as an alternative which gives a lovely note to the stew)

Dumplings

  • 140 g chilled butter (chopped into small cubes)
  • 250 g self-raising flour
  • 1 -2 tbsps grated parmesan
  • 125 ml water
  • Chopped fresh parsley for the dumplings and garnish

Instructions

Prepare and Roast the Chicken

  • Preheat oven to 120°C  (fan) / 140°C (conventional) / gas mark 1.
  • Place herbs in chicken’s cavity and around the chicken in a roasting tray. Add lemon halves and garlic bulbs to the tray.
  • Crush 2 garlic cloves and add to butter. Rub into chicken and drizzle with olive oil. Season and place in oven for 3 hrs. After it has been in the oven for 90 mins, baste with the juices and return to the oven.
  • About 15 mins before the end of the cooking time for the roast chicken, increase heat to 200°C (fan) / 220°C (conventional) / gas mark 7 to crisp skin. Once the skin is crispy, to your liking, leave to rest uncovered out of the oven for 15 mins.

Prepare and Cook the Vegetable Stew

  • While chicken is in the oven, heat oil in a casserole dish or other dish which can be placed in an oven (approx 3 litres capacity) over medium heat.
  • Add potatoes and cook for about 5 mins. Add flour and mix - this will help to thicken the gravy for the vegetable casserole.
  • Then add vegetables, with the slowest cooking veg going in first, with around 2 minute intervals between each addition (carrots, parsnips, leeks, mushrooms). Hold back on the broccoli for now.
  • Add bay leaves, thyme leaves and garlic and mix. Add wine, if using. Then add the stock and lower the heat and let simmer until vegetables are soft.
  • Season to taste. You can put the lid on the casserole once simmering or if you have cooked the casserole early on and intend to reheat prior to adding the dumplings.

Prepare the Dumplings

  • Rub butter into flour until it looks like bread crumbs. Add chopped parsley and parmesan. Add water and form into a dough. Divide and make 8 balls.
  • While the stew is simmering and about 5 mins before increasing the temperature of the oven to crisp the chicken skin, remove the lid of the casserole dish (you will have no further need for it during the remaining cooking steps). Add broccoli and dumplings and let the stew simmer.
  • Place stew in oven with chicken (200°C (fan) / 220°C (conventional) / gas mark 7) 15 minutes before roast chicken has finished cooking. Check in on dumplings half-way through cooking time i.e. when you take the chicken out to rest.
  • Leave stew in oven as the chicken is resting for a further 15 mins (overall about 30 mins in the oven) for dumplings to turn golden.

Serve The Alternative Roast

  • Serve vegetable stew with roast chicken and a side of cranberry sauce. Sprinkle the chicken and stew with some finely chopped parsley. Ladle vegetable stew and dumplings into pasta-style bowls, place a portion of carved chicken on top with a dollop of cranberry sauce and tuck away.


A Guide to Essential Ingredients for Persian Dishes

Use this guide to help you stock up on essentials for Persian cooking. In this article you will learn about the core ingredients for many Persian recipes, where to buy them and how to store them.

Saffron (Zafferan)

Saffron is used regularly in Persian cuisine. Even some desserts list it as an ingredient, therefore it is an essential to stock up on.

What is Saffron?

It is a delicate bright red spice harvested from crocus flowers. Sometimes referred to as ‘Red Gold’ because it is the most expensive spice in the world!

The flavour profile is a mixture of floral, musty and bitter. It is used very delicately to flavour Persian dishes so as to enhance and not overpower the other elements it is cooked with.

Why is it so expensive

Harvesting is labour intensive as each crocus flower yields just three stigmas, which are picked by hand and then dried to create the saffron strands. Apparently it takes up to 200,000 individual flowers to yield about half a kilogram of saffron. The resulting saffron strands are deep red (stigmas). The yellow tips you see in the picture above are the styles from the crocus flower. High grade saffron does not include the yellow styles and only has the red stigmas.

How is it used

Saffron is used to flavour and give a vibrant colour to Persian stews, kebabs and some desserts including ice-cream.

To get more out of your saffron, grind the saffron strands following purchase in a pestle and mortar or a spice grinder. Grind the saffron to a fine powder. 

Prior to adding to any dish, always bloom the saffron in water. This will help release the colour and flavour of the saffron and permeate into your dish far better than just sprinkling it in. The process of grinding and blooming is best practice for saffron as it also means your saffron will go further.

Where to buy

I recommend Iranian saffron, which can be bought from Iranian or Middle Eastern food shops.  Alternatively, if you have an Iranian friend then ask them if they have any spare – the generosity of Iranians is well known particularly when it comes to food!

Make sure you are not buying low quality saffron! The picture above is actually an example of low quality saffron as the strands include the yellow styles from the flower

You can find more information on saffron in my article published here.

How to store

Store your saffron in an airtight container in somewhere dark, cool and dry.

Recipes using Saffron

Here are a few recipes to try:


Turmeric (Zard Chubeh)

What is Turmeric?

Turmeric is a member of the ginger family. Its root is used in cooking and is commonly found in powdered form, although the fresh root is becoming more available in the UK. 

A bright orange powder which stains fingers, clothes and work surfaces easily! It has a flavour profile that is earthy, musky and bitter. 

The health benefits of turmeric have been well documented with a focus on its anti-inflammatory properties. Turmeric is a superfood and it features heavily in Persian cuisine, particularly in the meat dishes. It flavours the meat and helps to extinguish the pungent meat smell when cooked with onions.

Where to buy

The British love for curry has seen ground turmeric made available in all local supermarkets. I buy mine in bulk markets from a local Asian supermarket.

How to store

Turmeric should be stored in a cool, dry area and in an airtight container i.e. spice jar with a screw lid. Hints that you need to replace your turmeric are the colour loses its vibrancy and becomes a dull brown and the aroma is weak. As soon as you open your turmeric jar, the strong musky notes should hit your nose.

Recipes using Turmeric

Here are a few recipes to try:


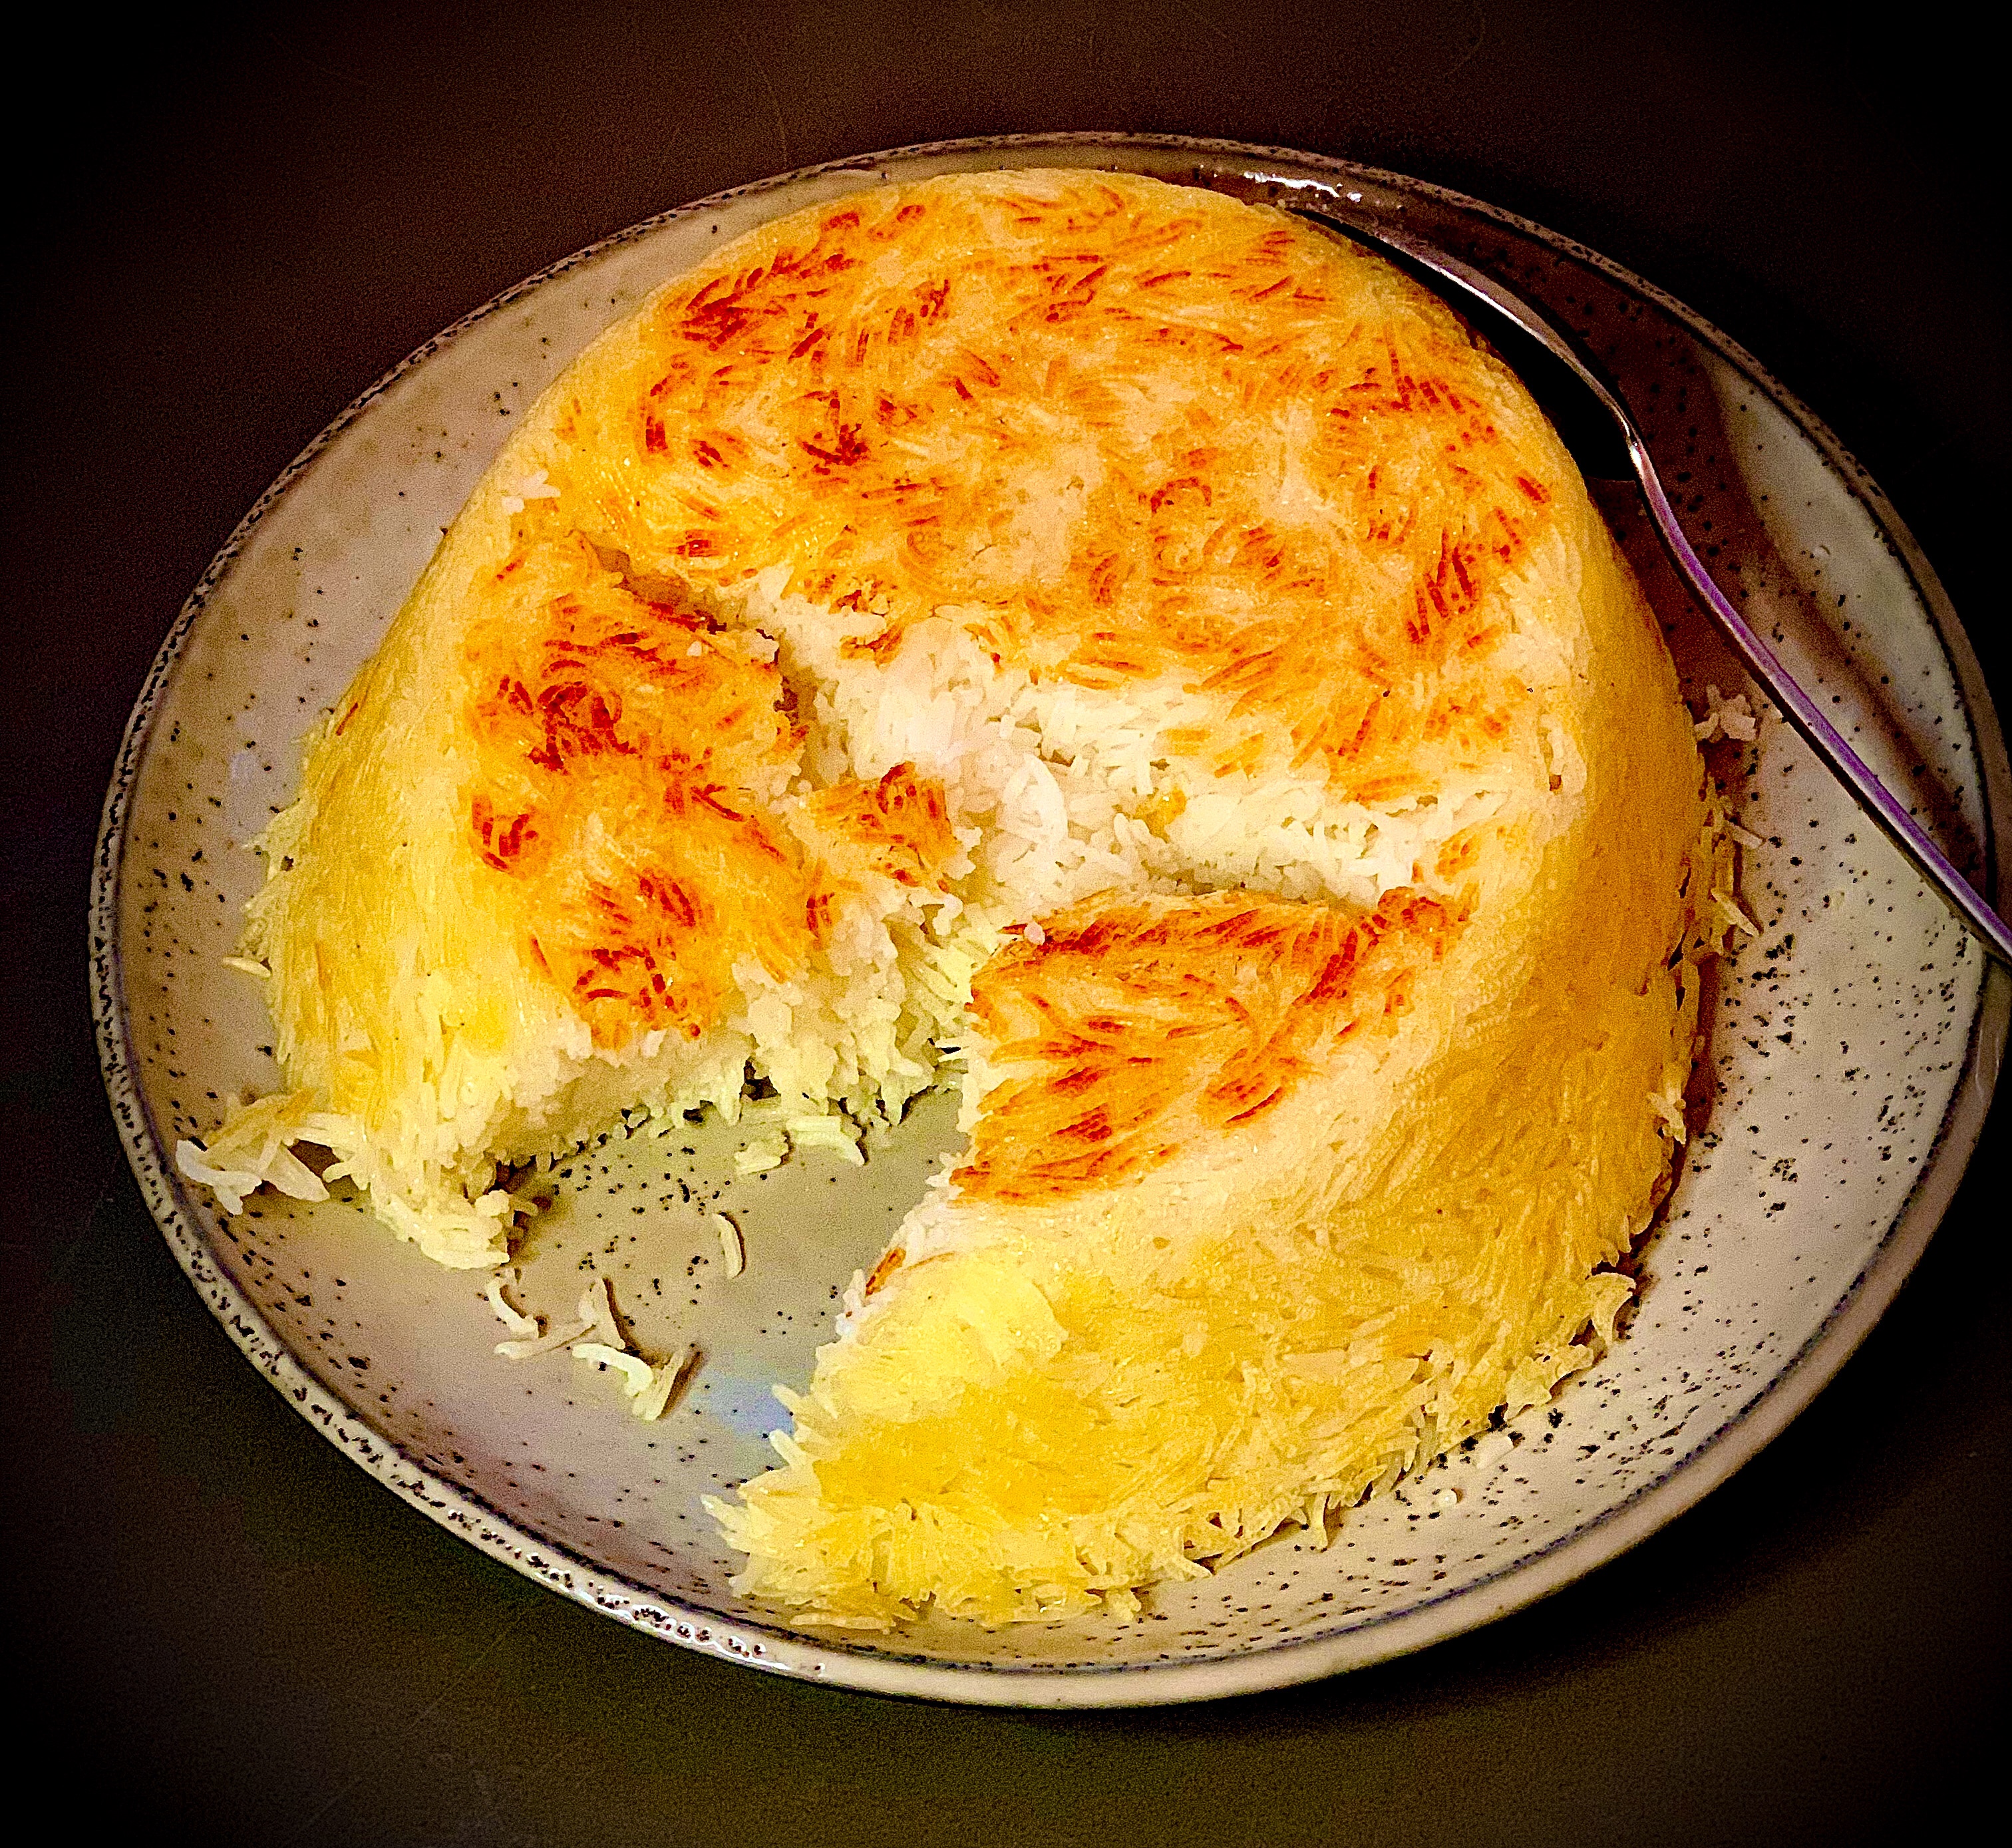
Basmati White Rice (Berenj)

There is no substitute for this type of rice. It is an absolute must if you want to recreate the many delicious and unique rice dishes.

What is Basmati Rice?

Rice is the seed of a grass species. Basmati is a variety of long-grained aromatic rice primarily grown in Pakistan, India and Nepal.

Long grain white rice, when cooked the Persian way, creates beautiful separate strands of fluffy rice. It involves a four-step process: washing, soaking, boiling and steaming. Some brands are now offering extra-long grain rice, which results in an even more sophisticated looking rice dish, so if you can get your hands on this type of rice, then please do. 

Where to buy

Most UK supermarkets stock it, but you can buy in bulk (10kg bags) and for cheaper if you pop to your local Middle Eastern or Asian supermarket.

I recommend that you always soak the rice before cooking. Not all consider this stage is necessary anymore in light of the quality of long grain basmati rice available, however it is of note that some famous brands recommend soaking their rice for 30 minutes pre cooking. Soaking the rice promotes more thorough cooking by allowing moisture to reach the centre of the rice grain, allows for better absorption of vitamins and minerals and it further improves the final texture, by making the grain less brittle.

How to store

Keep it in a cool and dry area of your home such as pantry.

Rice Recipes


Persian mixed spice (Advieh)

What is Advieh?

Advieh is the Persian equivalent of mixed spice. It is used in many dishes with the combination of spices varying from region to region in Iran.

Advieh is a fragrant mix of spices and can be compared in use to garam masala in Indian cooking, whereby the addition of advieh seasons the dish and adds a further layer of aroma. It can simply be sprinkled on a plain rice dish, added to stews and marinades for meat.

Where to buy

The advieh I use is a mixture of nutmeg, rose petals, cumin, cardamom, coriander, cinnamon and black pepper. I buy it online from a supplier on Etsy; however, this can also be picked up from most Iranian or Middle Eastern food shops.   

How to store

It should be stored in a cool, dry area and in an airtight container i.e. spice jar with a screw lid. 

Recipes using Advieh


Dried Mint (Nanaa)

What is Mint?

Mint is an aromatic, green perrenial herb. It is a hardy plant and grows abundantly in the UK. Persian recipes primarily use dried mint but fresh mint is sometimes required.

From being used in dips and salads to being included in some of our hero dishes like Ash Reshteh (a herb, lentil and noodle soup) and Khask-e-Bademjan (an aubergine and caramelised onion dip), it is definitely an essential store cupboard item. 

Where to buy

Like turmeric, this is an easy to source ingredient, with most local supermarkets stocking dried mint in their herbs and spices aisles and fresh mint in the salad section. As it grows abundantly in the UK, feel free to skip the shop bought stuff and make your own. Just dry the leaves in your airing cupboard and grind them.  

How to store

Dried mint should be stored in a cool, dry area and in an airtight container. Fresh mint should be stored in the fridge.


Sumac (Somagh)

What is Sumac?

Sumac is derived from the dried and ground berries of the wild sumac flower and is used in Persian cooking as a seasoning for a number of dishes including kababs, rice and salads.

It is a tangy spice with a sour and acidic flavour reminiscent of lemon juice. 

Where to buy

Sumac is very easy to get your hands on and can be found in your local supermarket. I recommend buying sumac from your local Iranian or Middle Eastern food store if you have one near you.

How to store

Store in an airtight container and in a cool, dry area. 

Recipes using Sumac


Dried Limes (Limoo Amani)

What is Limoo Amani?

Limoo Amani are limes which have been brined and then dried in the sun to lose water content. Originating in Oman – hence the Iranian name Limoo (lime) Amani (Oman) – they are used whole, sliced, or ground, as a spice in many Middle Eastern dishes. They come in both brown and black varieties. The black ones have been dried for longer. 

They are used in Persian cooking to flavour the stews of Ghormeh Sabzi (herb and lamb stew) and Gheymeh (yellow split pea and lamb stew). The limes are pierced and left in the stew to simmer to release their unique and distinct flavour profile of sour, citrusy, earthy, smoky and bitter.  

Where to buy

They can be purchased from an Iranian or other Middle Eastern food store. Alternatively, they can be bought online.

Recipes using Limoo Amani


Rose Water (Gol Ab)

What is Rose Water?

Rose water is water made by steeping rose petals in purified water.

Since ancient times it has been used nutritionally, medicinally and as an ingredient for perfume. Many Middle Eastern women still use rose water as a facial toner, a natural product and a lot cheaper than modern cosmetic brands.

It is used in Persian, other Middle Eastern and Indian cuisine, particularly desserts such as ice cream, cakes and biscuits. It is also used in savoury dishes, in particular for scenting rice dishes, adding a unique floral note.

For those of you who may not be familiar with rose water as an ingredient, if you have ever eaten Turkish Delight then you know the effect of adding rose water as an ingredient. 

Where to buy and how to store

You can buy rose water from most Iranian or other Middle Eastern or Asian food store. You may also find it in your local supermarket. Again, if you can get your hands on Iranian rose water then all the better.

Once opened, store the rose water in the fridge to keep it fresh for longer.

Recipes using Rose Water


Pomegranate Molasses (Rob-e-Anar)

What is Pomegranate Molasses?

Pomegranate molasses is a thick syrup with a dark grape colour made from reducing pomegranate juice. The juice is obtained from a tart variety of pomegranate.

The flavour profile is intensely sweet and sour and it is primarily used in a Persian stew made with walnuts, called Fesenjoon. It can also be used for salad dressings and desserts.

The Northern Province of Iran uses pomegranate molasses for a number of their recipes including Kal Kabab (a smoked aubergine dip); Zeytoon Parvardeh (marinated olives); and kabab Torsh (meat marinated in a paste made of pomegranate molasses, garlic and crushed walnuts and then cooked on a charcoal fire).

Where to buy and how to store

You can pick it up at some local supermarkets. You can also buy it online or from your local Iranian or other Middle Eastern food store.

Store in the fridge once you have opened the bottle.

Recipes using Pomegranate Molasses


Pistachios (Pesteh)

What are Pistachios?

Pistachios are nuts and a member of the cashew family, growing on small trees originating from Central Asia and the Middle East. 

Whether in their shells, oven dried and salted, in bowls as nibbles at family parties, or used as fresh bright green kernels in Persian dishes such as Shirin Polo (a sweet and savoury rice served with chicken), pistachios are synonymous with the Persian culture. 

Where to buy and how to store

For the purposes of cooking some of the dishes on this site you will need fresh pistachio kernels, which are a vivid green with no skin on them, which you can buy from your local Iranian or other Middle Eastern food store.

Store them in the fridge in order to retain flavour and freshness.

Recipes using Pistachios


Fenugreek (Shambalileh)

What is Fenugreek?

Fenugreek is an aromatic Mediterranean plant that produces long pods containing light brown seeds which have a slightly bitter taste. Roasted and ground, they are used as a flavouring in curries. The leaves from the plant (often sold as methi) can be used in salads, and both fresh and dried leaves are used in Persian and Indian cookery.

The seeds and the leaves have a strong aroma and the smell is instantly recognisable if you have had your fair share of curries or eaten everyone’s favourite Iranian stew – Ghormeh Sabzi (herb stew with lamb).  

Fenugreek is used in the famous Persian lamb, kidney bean and herb stew, Ghormeh Sabzi. It is also used in Meygoo Polo (prawn rice) and Eshkeneh (a potato and onion egg-drop soup).

Where to buy and how to store

I source my fresh and dried fenugreek / methi from my local Asian supermarket. Keep fresh leaves in the fridge or freezer and dried fenugreek in an airtight container somewhere cool and dry.  


Kashk

What is Kashk?

Persian kashk (other Middle Eastern countries have their own versions of kashk) is made from fermented sour milk or yoghurt. It is also used to describe dried buttermilk.

It comes in liquid or dried form. The dried form is often found in balls which are soaked in water to create the liquid kashk used in Persian dishes. I prefer the liquid form as it is quicker and easier to cook with.

It has a unique flavour profile that is sour and a little cheesy. I’m probably not selling this to you right now but it is a truly delightful addition to some of our famous dishes: Kashkeh Bademjan (the kashk is mixed in to an aubergine dish made with caramelised onions, garlic and mint); and Ash Reshteh (the kashk is mixed into a delicious herb, lentil and noodle soup).

Where to buy and how to store

You can buy kashk from Middle Eastern food stores or online. Keep in the fridge once opened. If you have bought a large jar, then decant into smaller portions and freeze.